Using Mantle Bridge
You can use the testnet bridge to get acquainted with the UI of the official Mantle bridge. The official Mantle Bridge on Mainnet operates in exactly the same way connecting to Ethereum Mainnet.
Deposit $MNT
Follow the steps below to deposit your tokens from Sepolia to Mantle Testnet:
-
Navigate to the testnet bridge and connect your wallet by clicking on the 'Connect Wallet' button in the top-right.
-
Select the 'Deposit' tab and enter the amount of
$MNTyou want to bridge over to Mantle Testnet, and then click on the button at the bottom to proceed with token approval.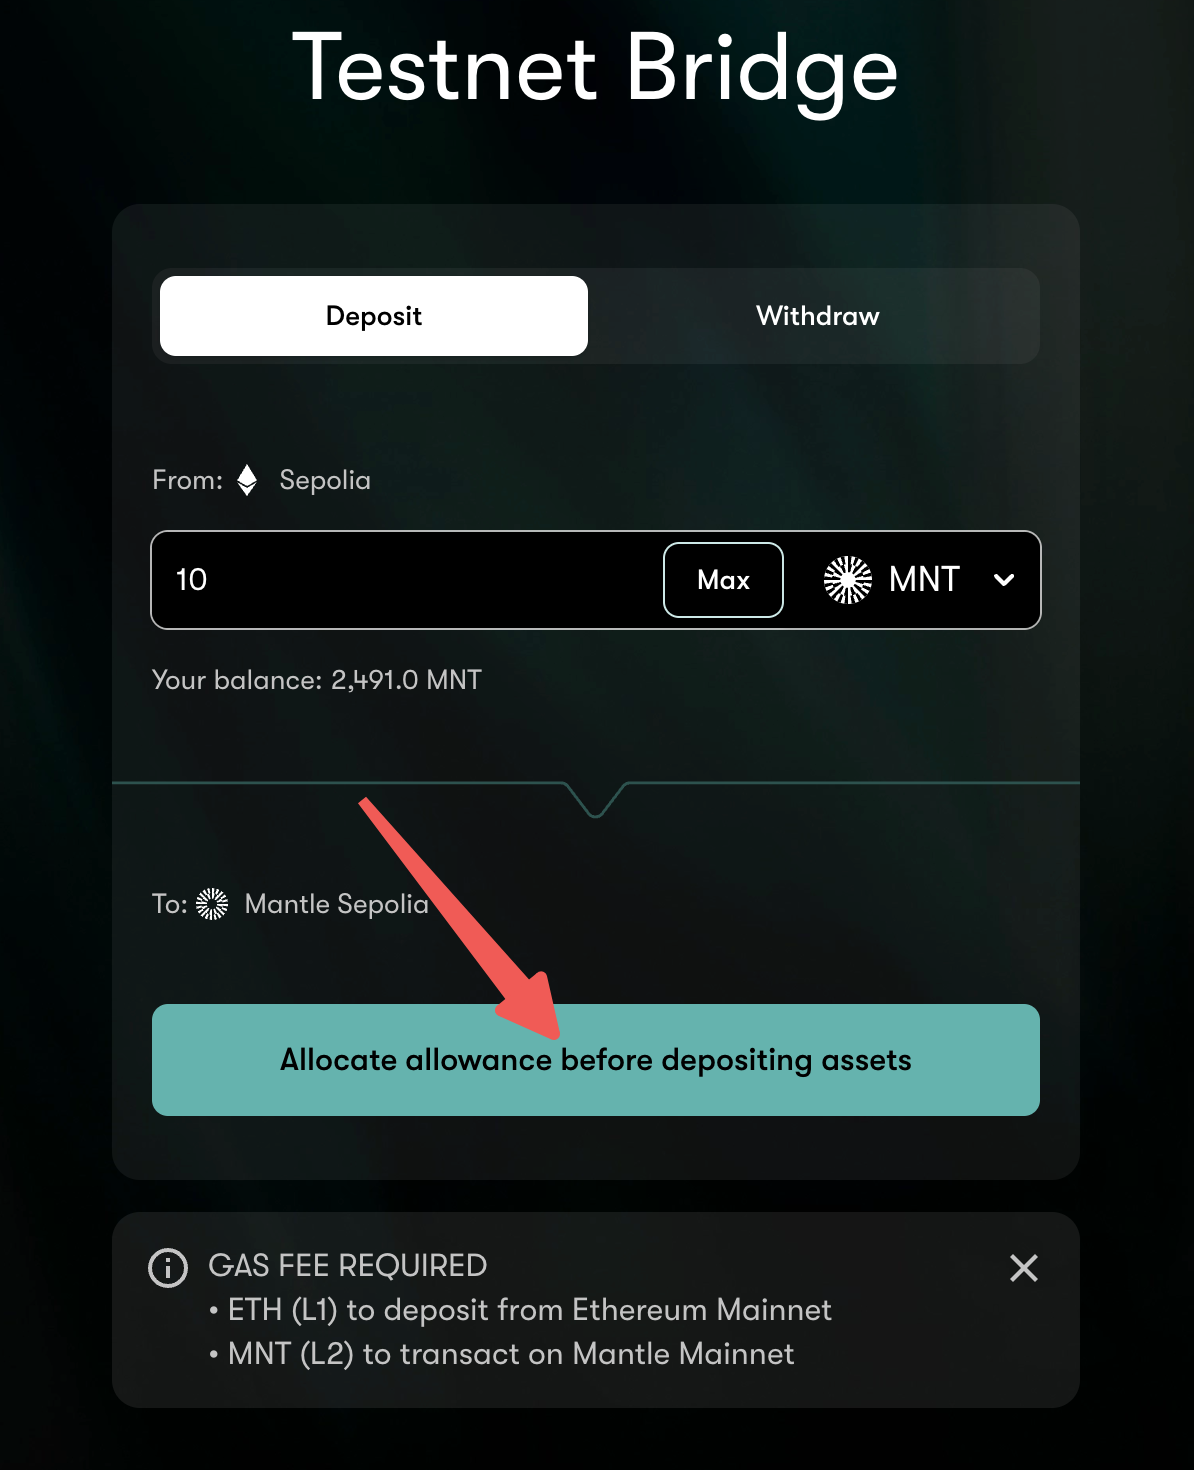
-
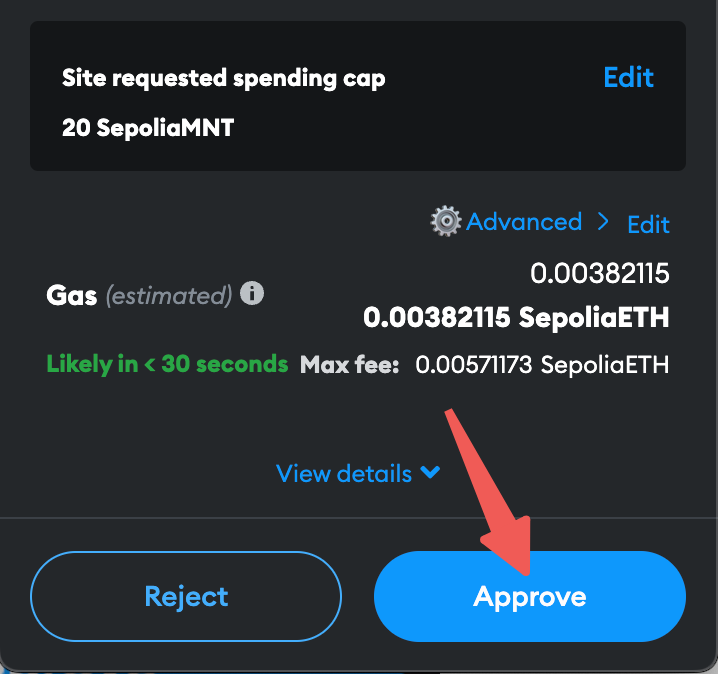
Enter an amount to approve to the contract. You can choose an amount you're comfortable with, but make sure its equal to or greater than the amount you're depositing. Then click on the 'Next' button.

-
Click on the 'Approve' button to approve the amount you entered. Approval may take some time, about 10 seconds or so.
-
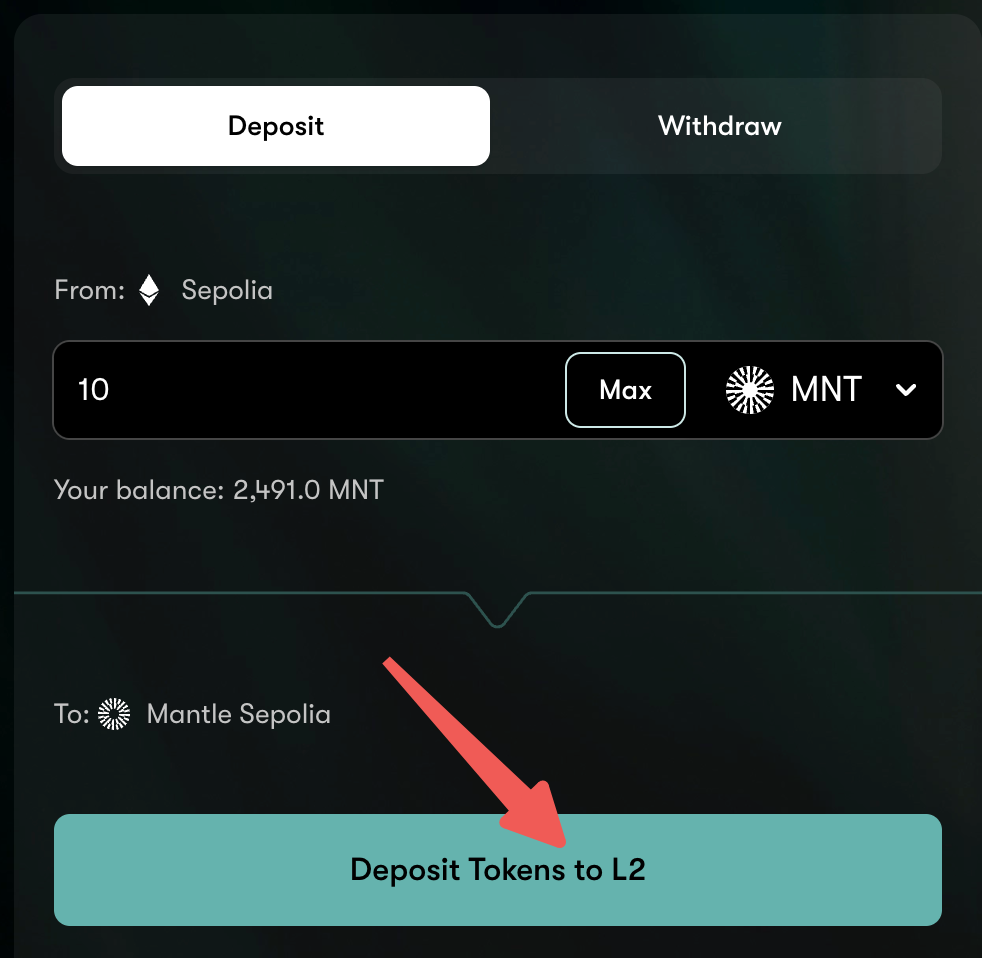
Once approval is successful, you'll see the 'Deposit Tokens to L2' button. Click on it to proceed to confirmation.
-
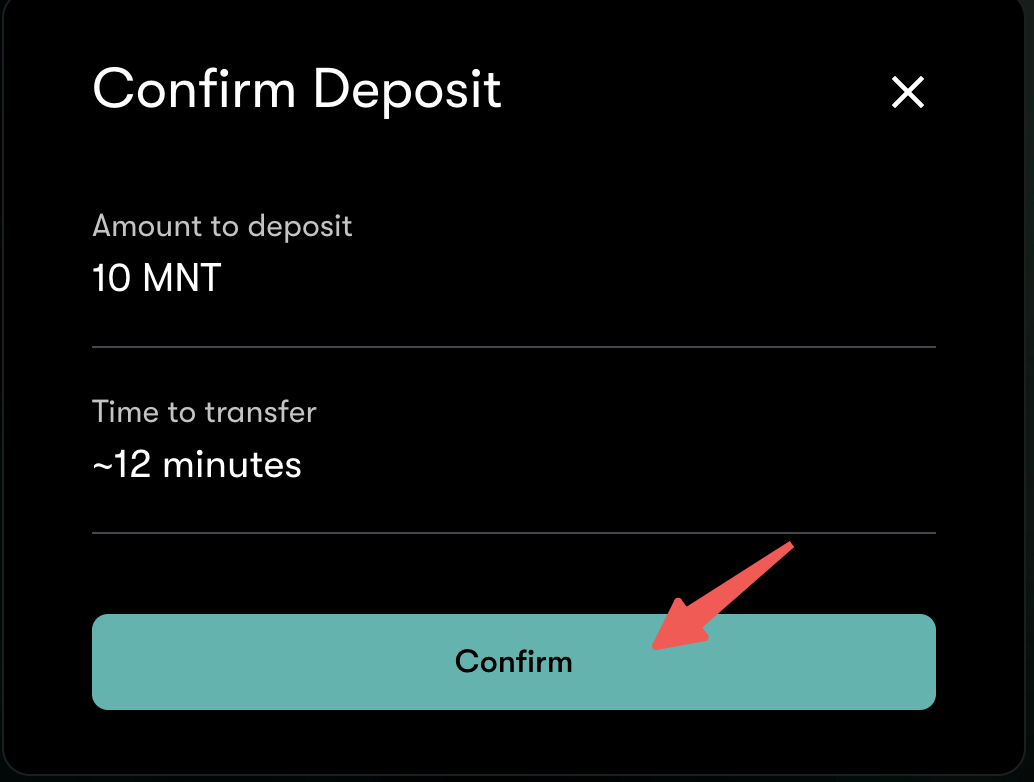
Here you'll be able to see the deposit amount and approximate time it'll take to complete the deposit operation. Finally, click on the 'Confirm' button to send a deposit transaction. You'll need to confirm the transaction in your wallet too.
-
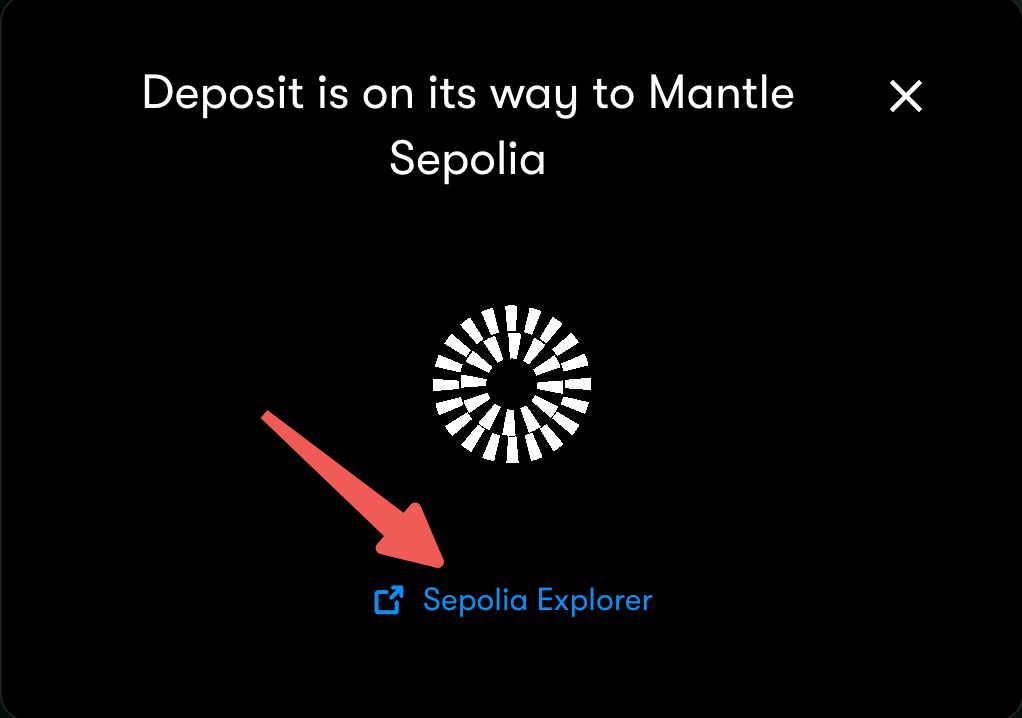
Feel free to check the transaction status by click on the 'Sepolia Explorer' button. Once complete the balance will be reflected in your L2 testnet wallet.
Withdraw $MNT
Follow the steps below to withdraw your tokens from Mantle Testnet to Sepolia:
-
Navigate to the testnet bridge and connect your wallet by clicking on the 'Connect Wallet' button in the top-right.
-
Select the 'Withdraw' tab and enter the amount of
$MNTyou want to bridge over to Sepolia, and then click on the 'Withdraw Tokens from L2' button at the bottom.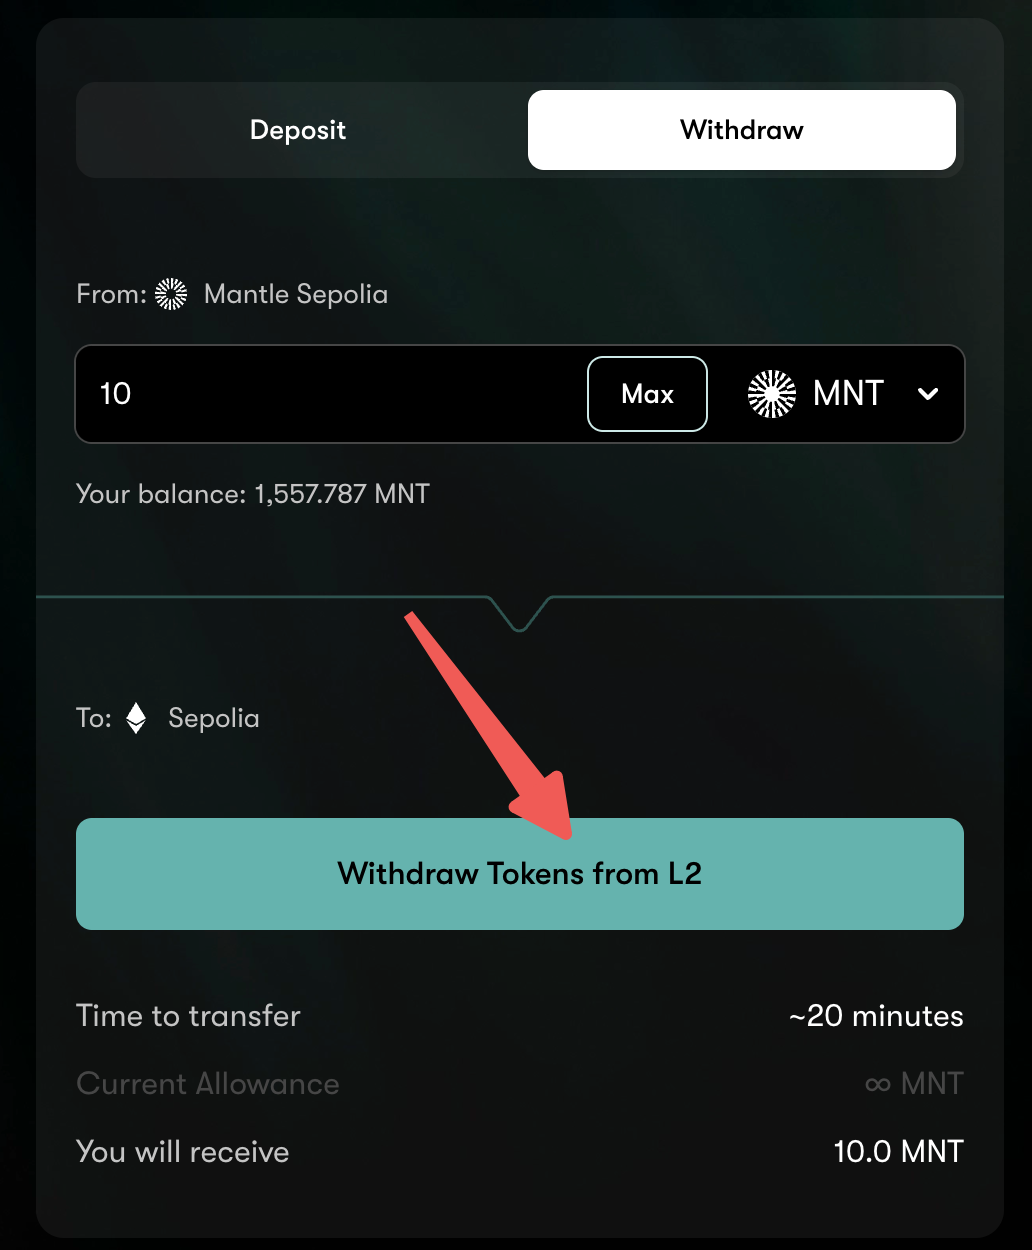
-
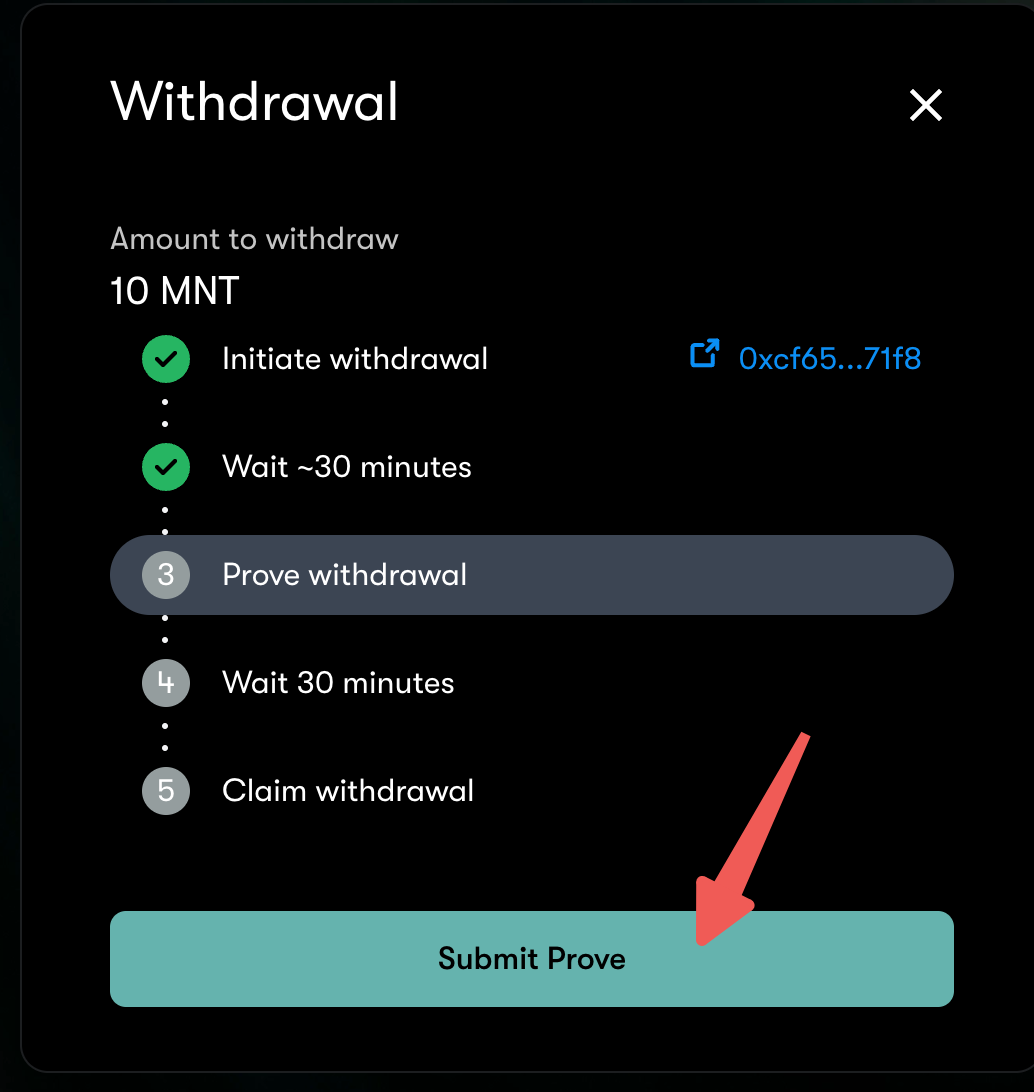
You'll be able to see the withdraw amount and an approximation for the amount of time it will take for the token transfer. Note that once complete, the amount still needs to be claimed on L1 for it to land in your wallet. Check the checkboxes, and click on the 'Confirm' button to send a withdraw transaction.

-
After we sign the transaction, which means you've initiated the withdrawal transaction, now we nedd to wait around 30 minutes for the transaction status to be ready to prove. Once the transaction is ready, you'll be able to submit prove the withdrawal.
-
Then we have to wait another 30 minutes for the transaction status to be ready to claim. Click on the 'claim' button and confirm the transaction in your wallet.

-
The
$MNTwill show up in your Sepolia wallet once the transaction is successfully sent.