Connecting Wallet to Mantle Network
You can connect your wallet to the Mantle Network in different ways, here we present you the following two ways:
Add by Using Chainlist
You can automatically add Mantle Network to your wallet with one click using Chainlist by navigating to the following pages:
Simply connect your wallet to the web page, click on the 'Add to Metamask' button that shows up, and approve the action in your wallet.
Add Network Manually
- Launch MetaMask and login to your wallet.
- The default network setting for the wallet is generally 'Ethereum Mainnet'. Click on the button in the top-left to bring up a dropdown menu. Click on 'Add Network' at the bottom of the dropdown menu.
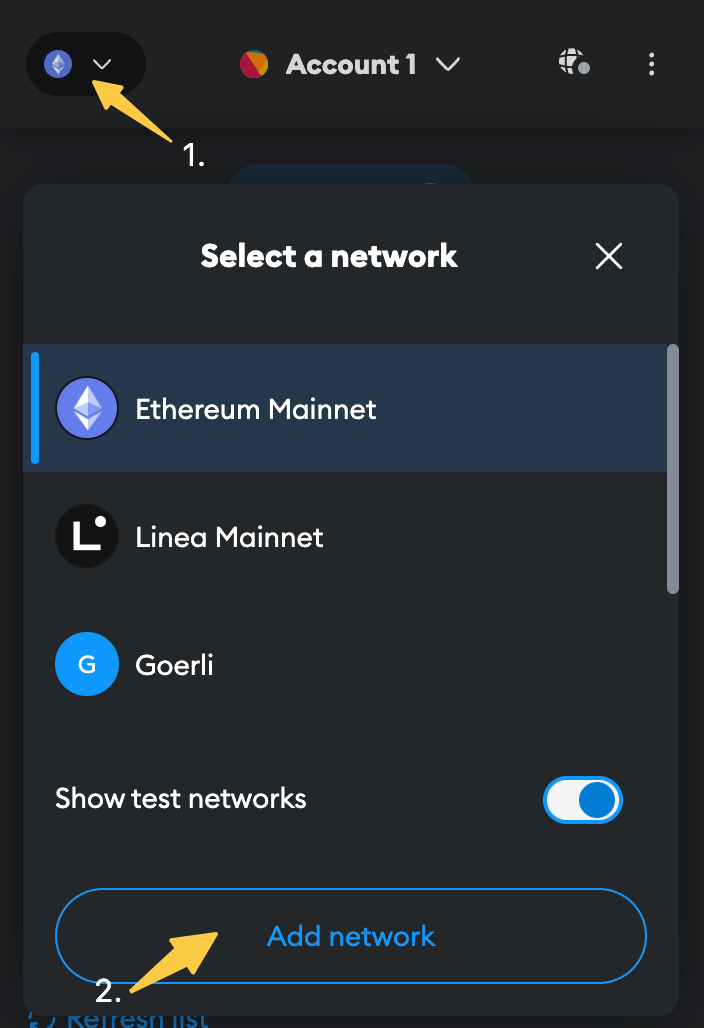
- This will take you the 'Add a network' page where you'll see multiple popular networks. Click on 'Add a network manually' to bring up a form
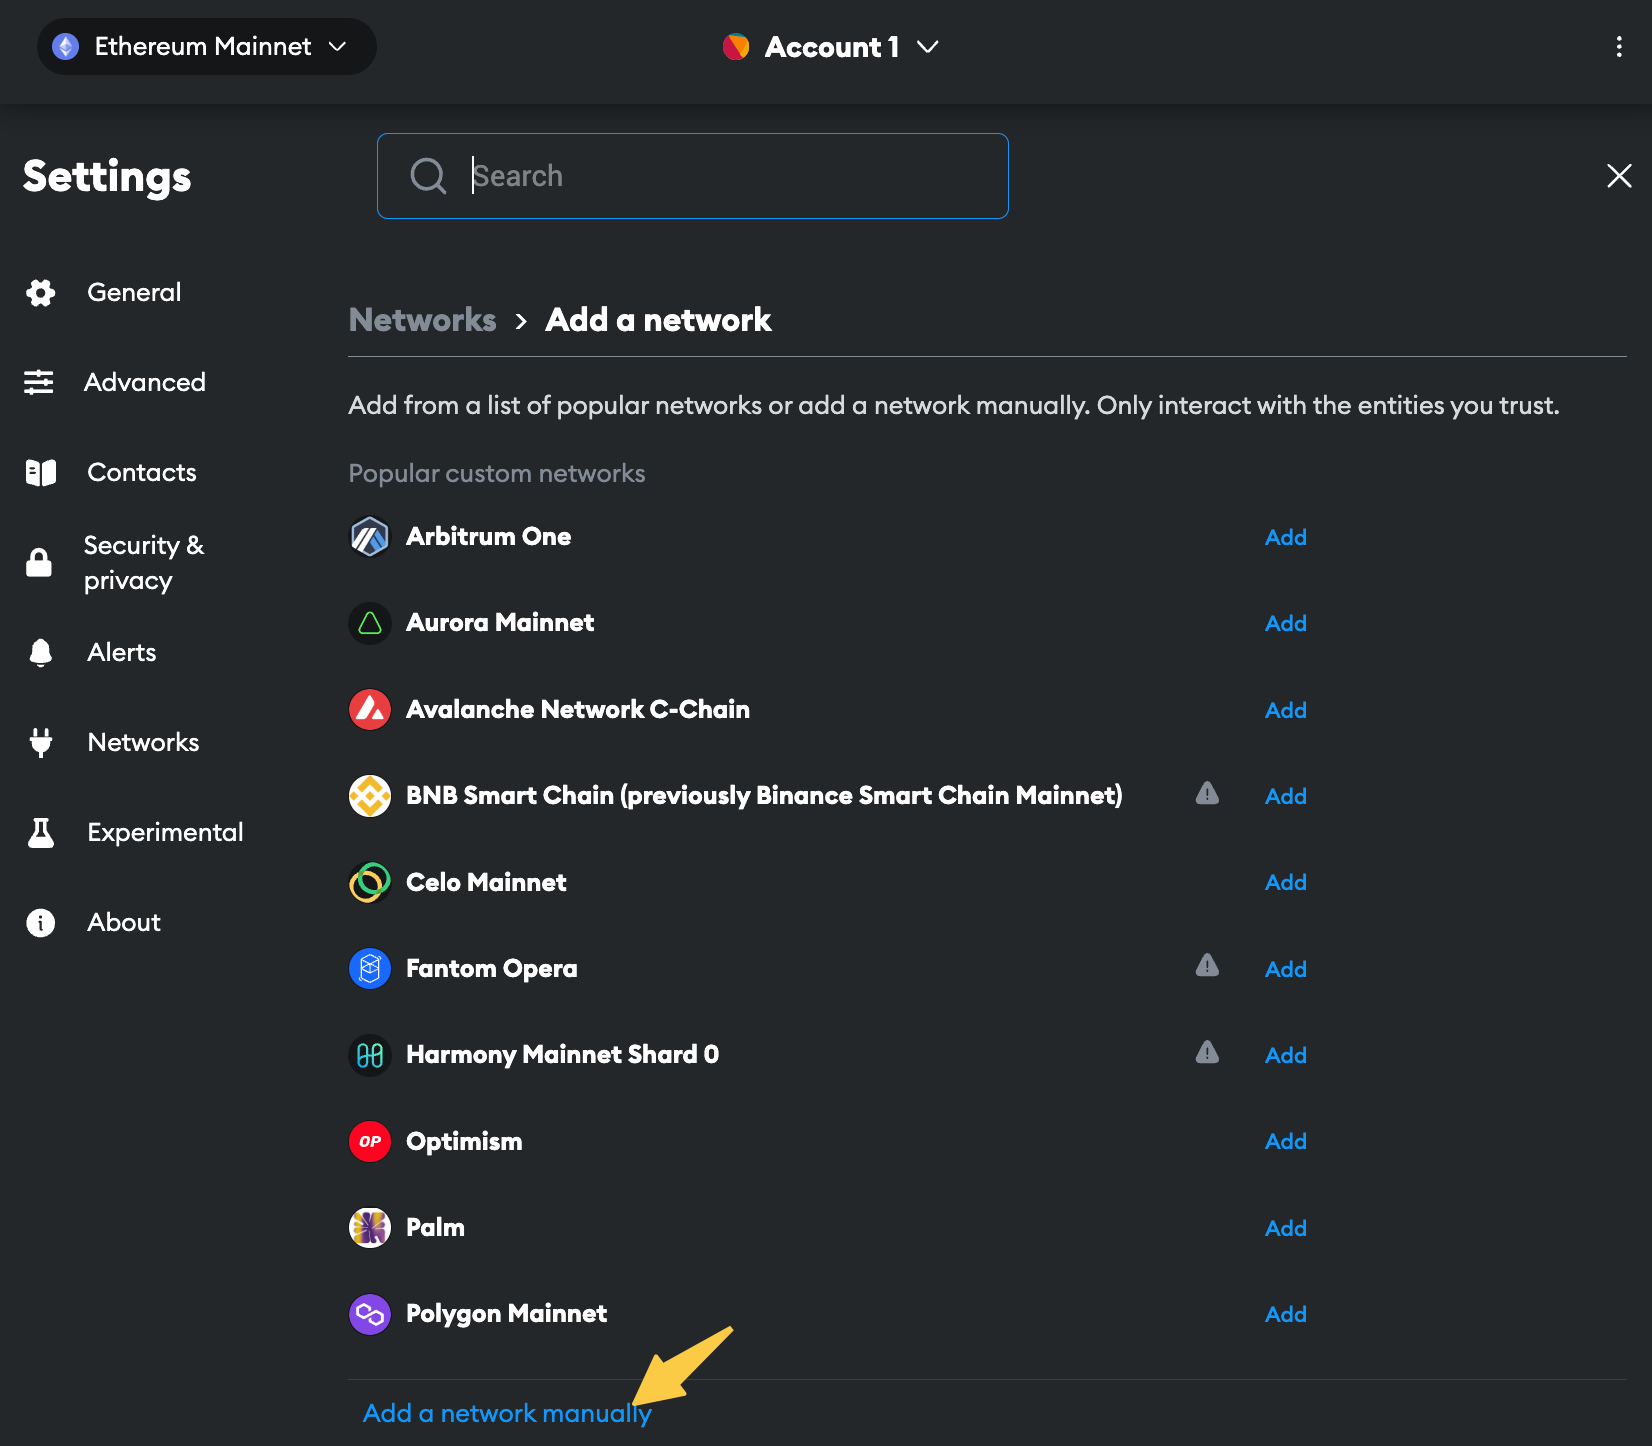
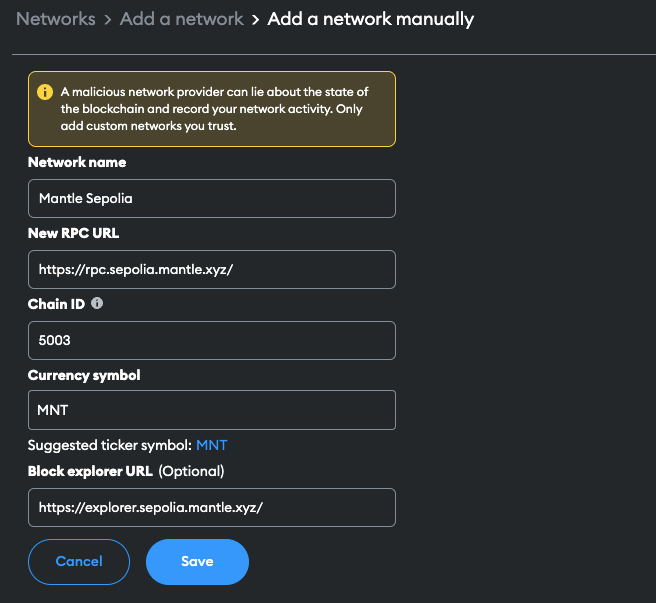
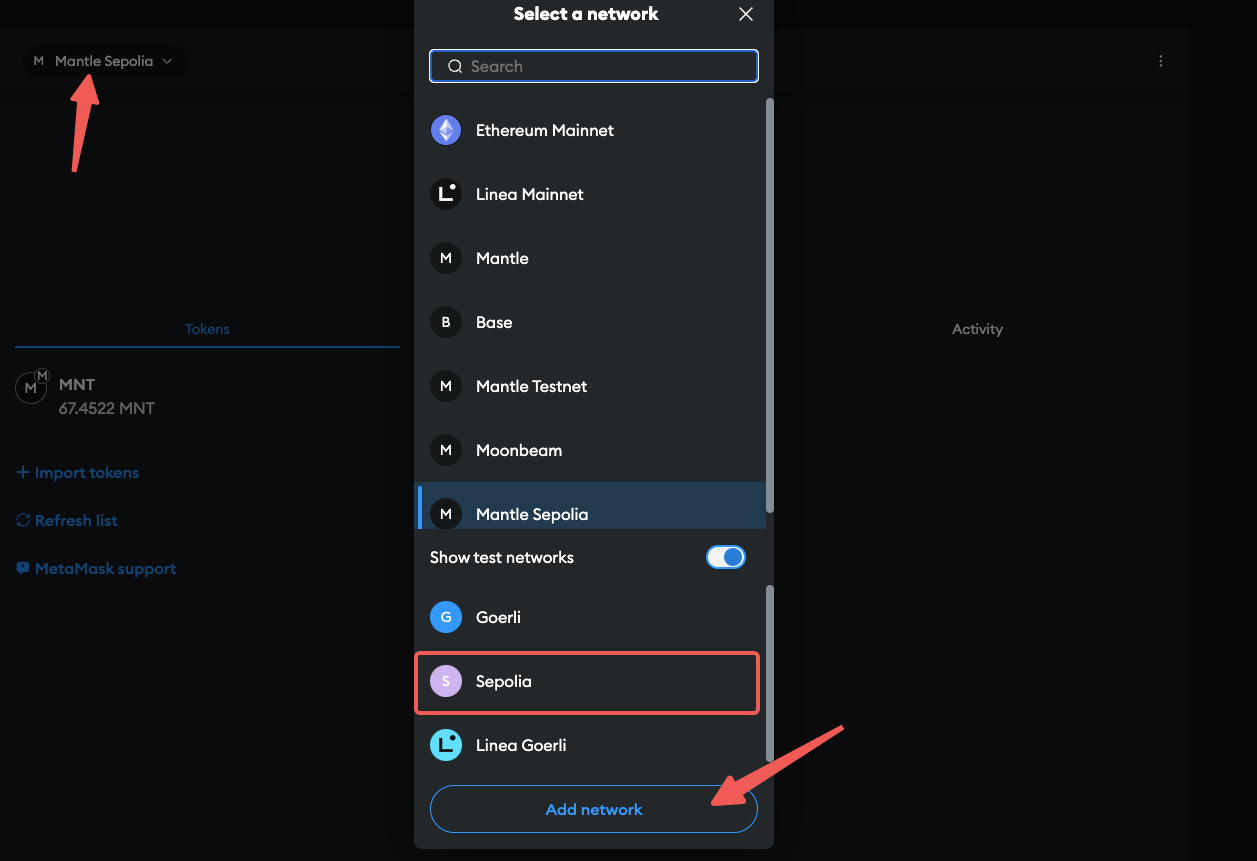
- Fill in the following info and click 'Save' to finish. The network option will appear in the network setting dropdown menu once you're done.
- Mainnet
- Testnet (Sepolia)
| Name | Description |
|---|---|
| Network name | Mantle |
| New RPC URL | https://rpc.mantle.xyz/ |
| Chain ID | 5000 |
| Currency symbol | MNT |
| Block explorer URL | https://mantlescan.xyz/ |
| Name | Description |
|---|---|
| Network name | Mantle Testnet |
| New RPC URL | https://rpc.sepolia.mantle.xyz/ |
| Chain ID | 5003 |
| Currency symbol | MNT |
| Block explorer URL | https://sepolia.mantlescan.xyz/ |
Add $MNT to Your Wallet
- Navigate to your wallet, switch to the Sepolia Testnet and click on the 'Import tokens' button at the bottom to bring up a form.
- Enter the
$MNTtoken contract address0x65e37B558F64E2Be5768DB46DF22F93d85741A9E, and as you do that the other two fields will get populated automatically.
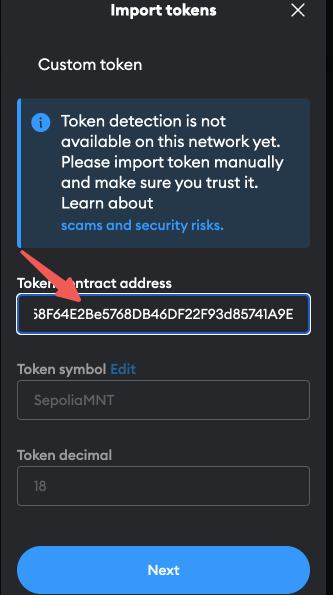
- Next, click on the 'Next' button at the bottom, and then click 'Import' in the next window to finish. You should be able to see your current balance.
Configure Your wallet
Mantle v2 Tectonic has the ultimate user experience by optimizing the fee mechanism. Users can set up basefee and priorityfee in MetaMask to greatly reduce the fee for transfers. Here is a detailed guide on how to configure your wallet.
- When you are ready to send a transaction using MetaMask, construct the transaction first, at which point we can see that the
Estimated feebefore it is set is a higher value.
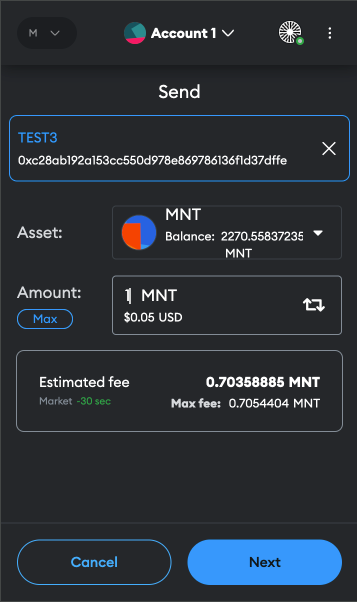
- Click the
Nextbutton, and then click the red box to enter the setting interface.

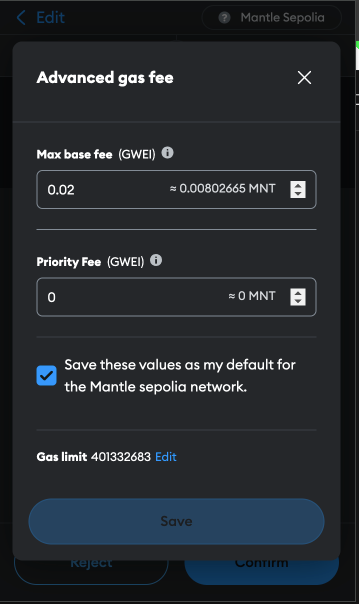
- Select the
Advancedbutton and we can see that we can set theMax base feeandPriority Fee, see here for the meaning of these two items. Here we set them to the lowest values, i.e.Max base feeis 0.02 gwei andPriority Feeis 0. Check the box below "Save these values as my default for the Mantle sepolia network. ", and then click the ❌ button in the upper right corner.
- Once the settings are complete, when you reconstruct the transaction, you will see that the
Estimated feewill be very low, clickConfirmto send the transaction.
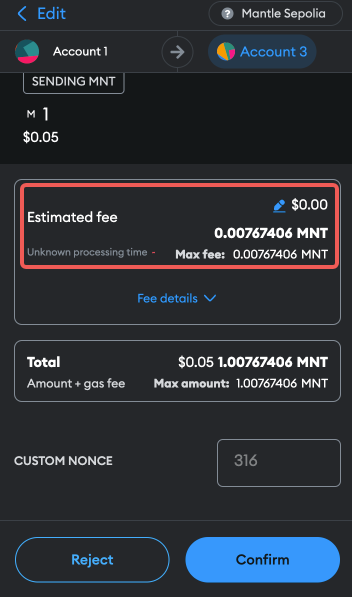
With this setup, you will enjoy extreamely high speed and low cost transaction processing in Mantle v2 Tectonic.